*Note: this user guide applies only to the Video on Demand feature available on the Android devices. VoD is also available on the Windows devices, however please contact Mood Media for further information
Video on Demand definition
Video on Demand (or VoD) is a platform that allows the user to play specific media types (e.g. video and image files) on demand by simply selecting the corresponding file using the remote control, the mouse, the keyboard or the touchscreen.
INFO | Support for TV Pass Through and Web Page media will soon be added to VOD. |
Add the video on demand content
INFO | Make sure you have access to MVision Full or MVision Advanced |
| Make sure the VoD channel’s name is properly formatted (using the [VOD] prefix) |
Step 1. Select the VOD channel
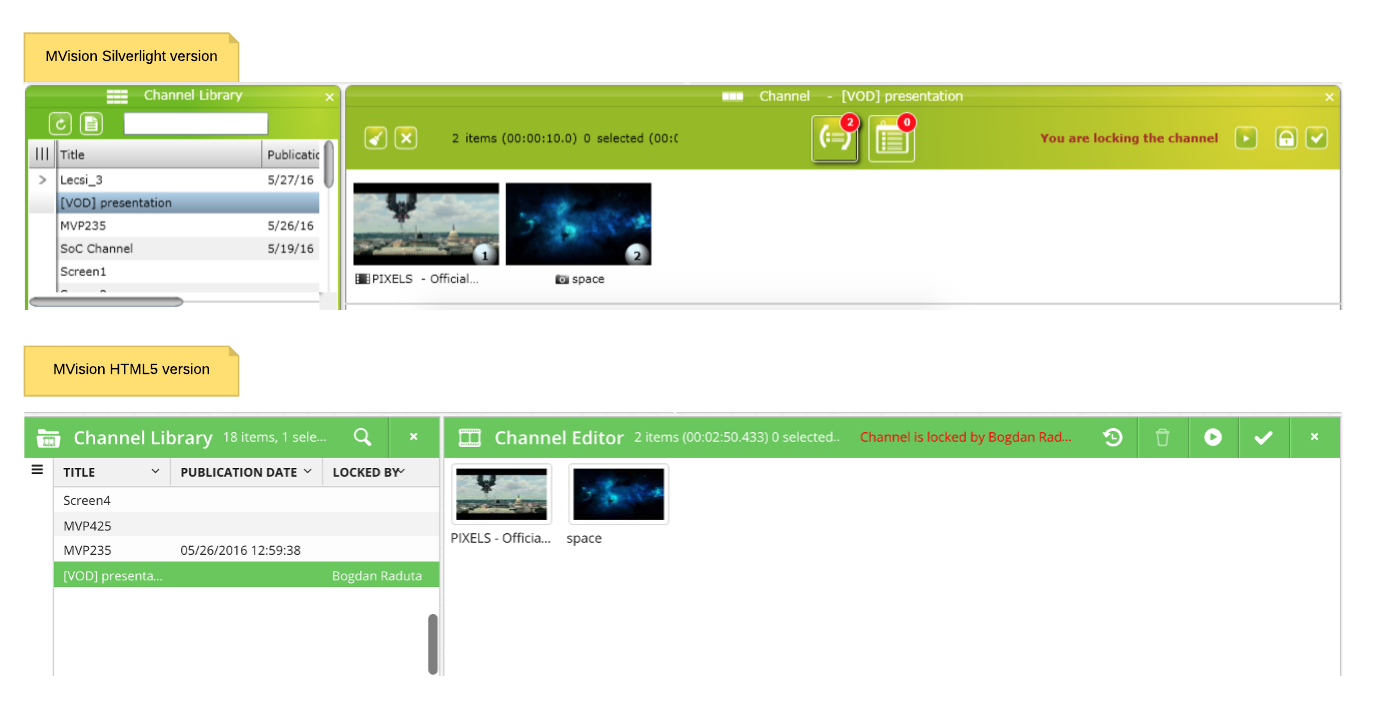
Step 2. Drag and drop the video on demand content inside the channel
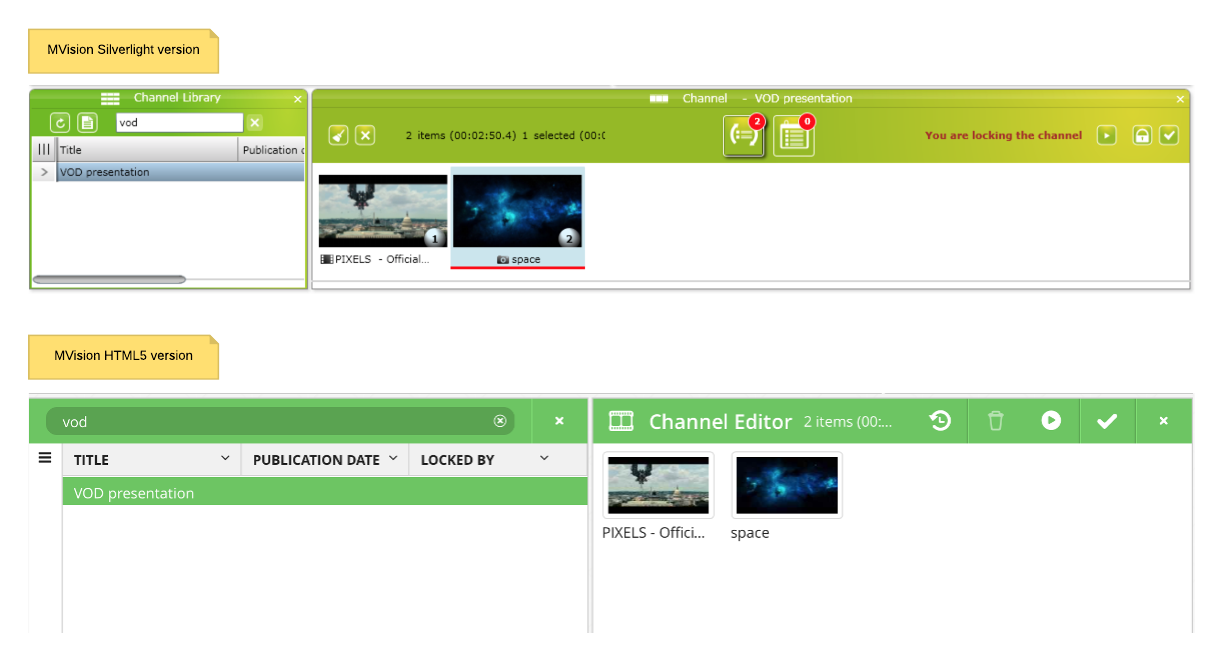
Optional: organize your VoD content using folders or set it using scheduling
If the user adds playlists or tags to the VOD channel, these will be seen as folders on the screen. The user can access the content included in the playlists/tags by opening the folder in the VoD library.
Furthermore, the scheduling is taken into account by the VoD application which means that if a media, a playlist or a tag is not scheduled to play at a given time, it will not appear. However, if VoD is running and a media, a playlist or a tag expired, it will not be automatically removed.
RECAP | The VoD content must be placed inside the VoD channel |
| The playlists and the tags placed inside a VoD channel will be interpreted as folders and their content will automatically be sorted alphabetically |
WARNING | Currently, VoD application can only support video, image media types and TV Pass Through (only for MVPTV product line) |
| Currently, VoD application can only support the following media containers: playlist and tag | |
| Currently, VoD application cannot support the following media types: flash, editable messages or web page media. |
Step by step instructions for using VoD on the Android player
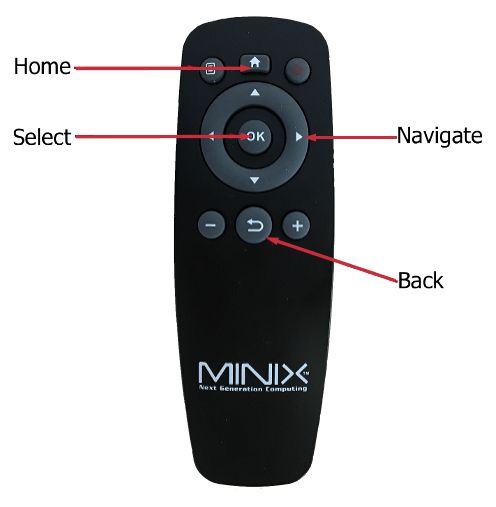
A Few Words About the Remote Control
The following steps describe how a viewer can use the VoD feature to play content on demand. This guide assumes the user has a compatible remote control. All MVision Android players come with an InfraRed remote control that can be used to access VoD content. Similarly to most TV remote controls, the included InfraRed remote control needs direct “line of site” of the media player in order to work properly. If the media player is installed behind the screen or in a remote location, it may be best to use a compatible RF remote control instead. Several models can be found online (e.g. http://amzn.com/B012S1IMA8) or feel free to contact Mood Media for assistance.
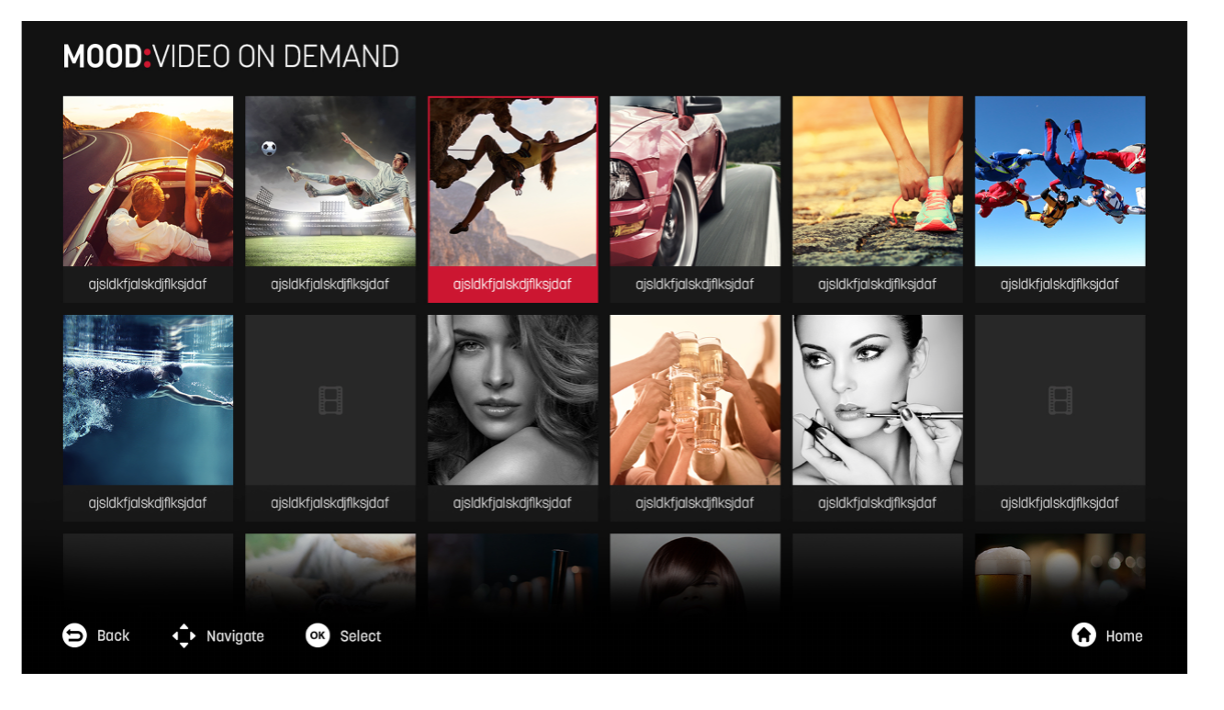
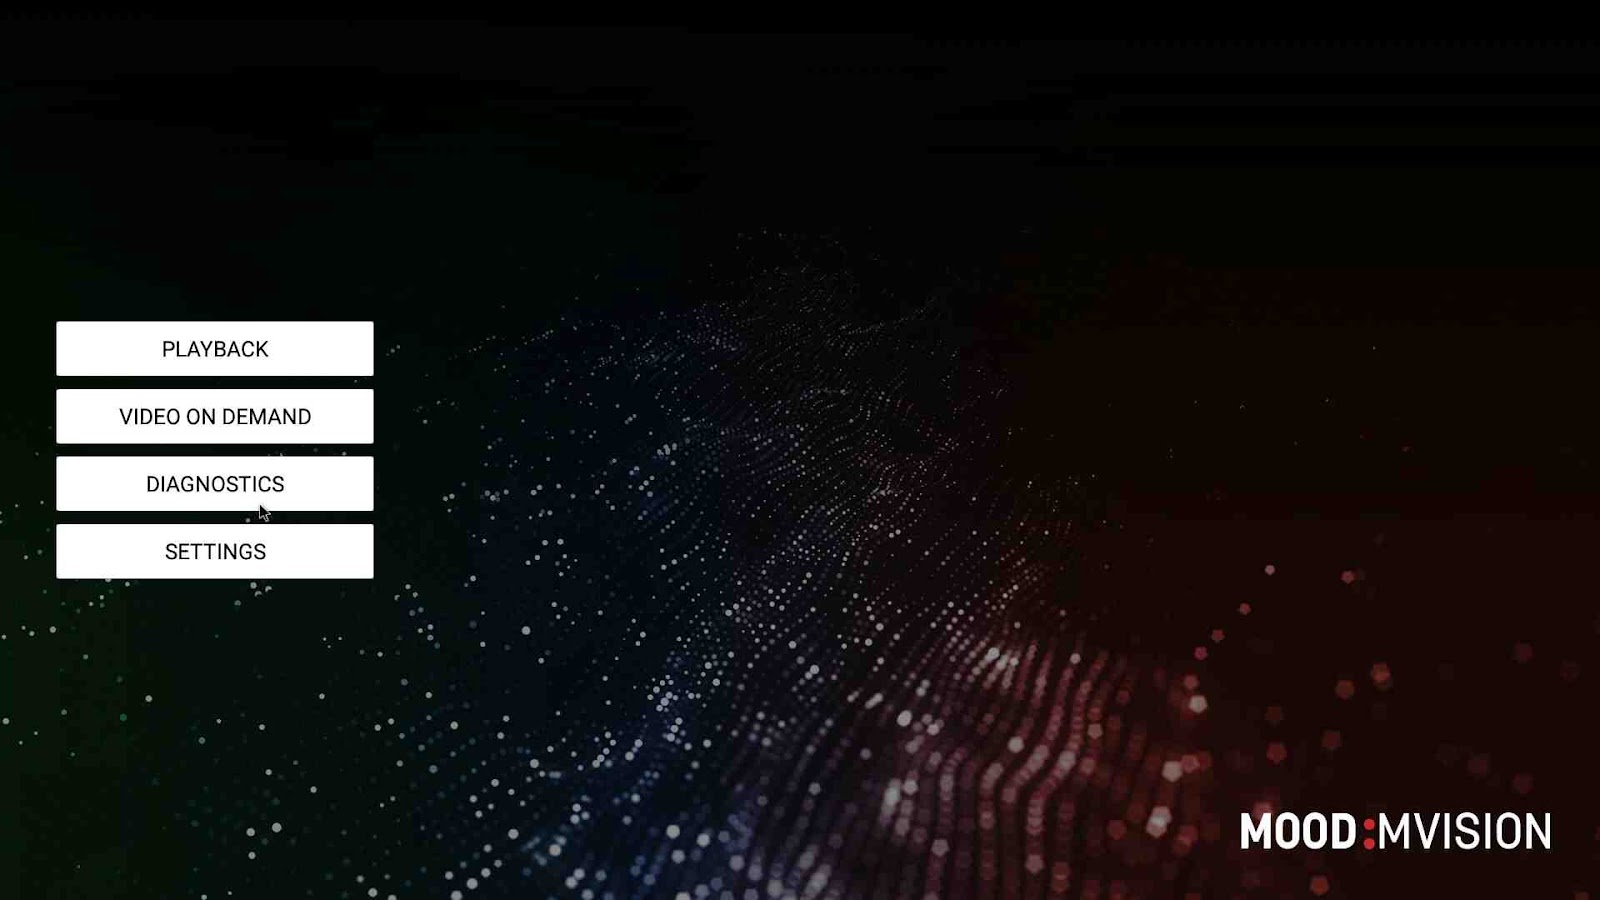
Step 1. Select the “Video on demand” from the player menu
(Hit home on the remote control to exit playback)
If no custom background or thumbnail sizes were defined in the player’s VoD configuration file, then the the application will appear as below:
Step 2. Navigate between the media files
Navigating between the media files can be done by using the remote control, the mouse, the keyboard or the touchscreen. The following instructions describe how to use the VoD module with the remote control. are focused only on the remote control usage.
Step 3. Navigate into a folder
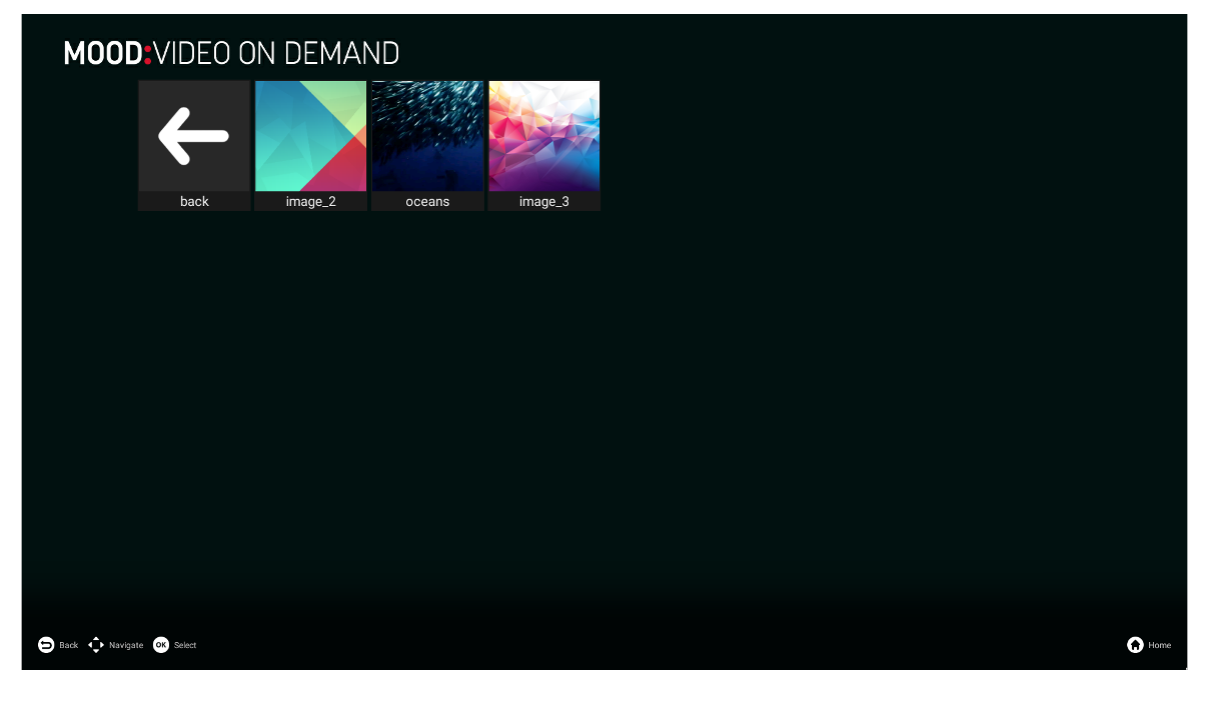
Navigating into a folder only requires to select it using the remote control or the keyboard and click the OK button. When a folder is opened, the very first item from the list will be the “Back” icon. The “Back” icon is used to navigate upwards, thus exiting the folder and returning to its parent.
Step 4. Play an image file
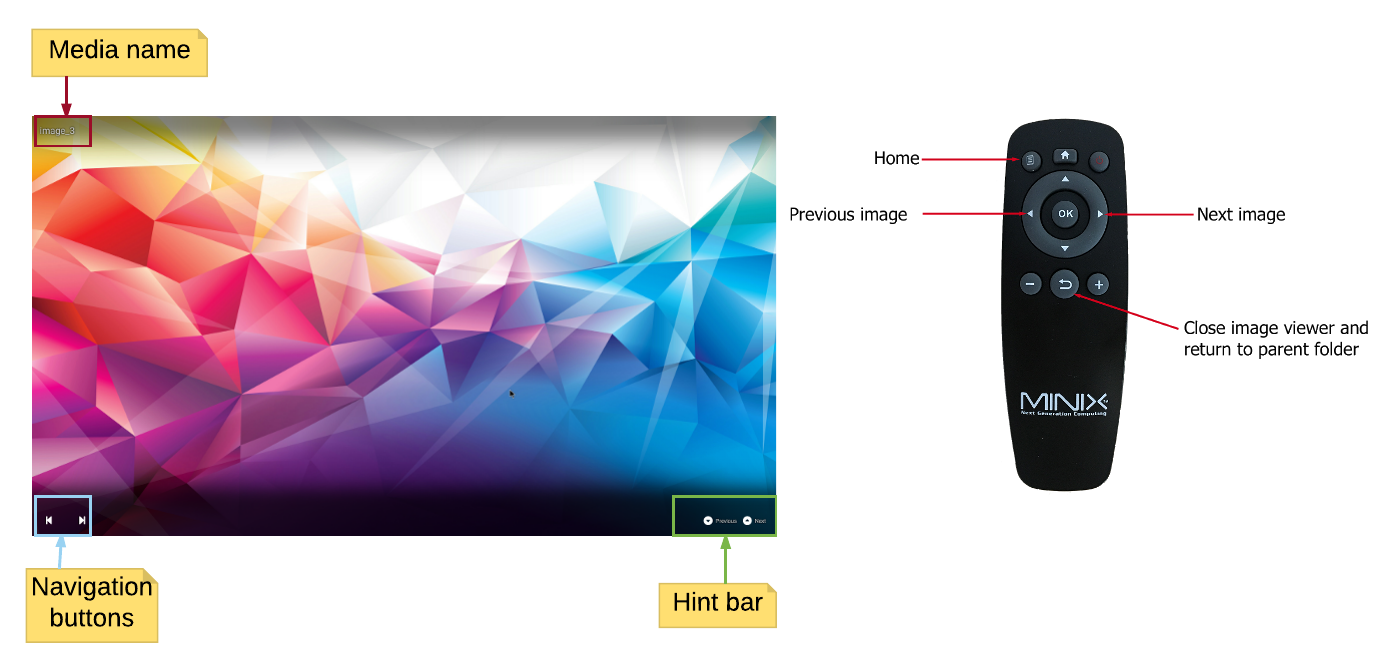
When opening an image, some of the remote control functions will be changed: the navigation buttons will become previous/next image navigation and the back button will close the image viewer and return the parent folder.
Step 5. Play a video file
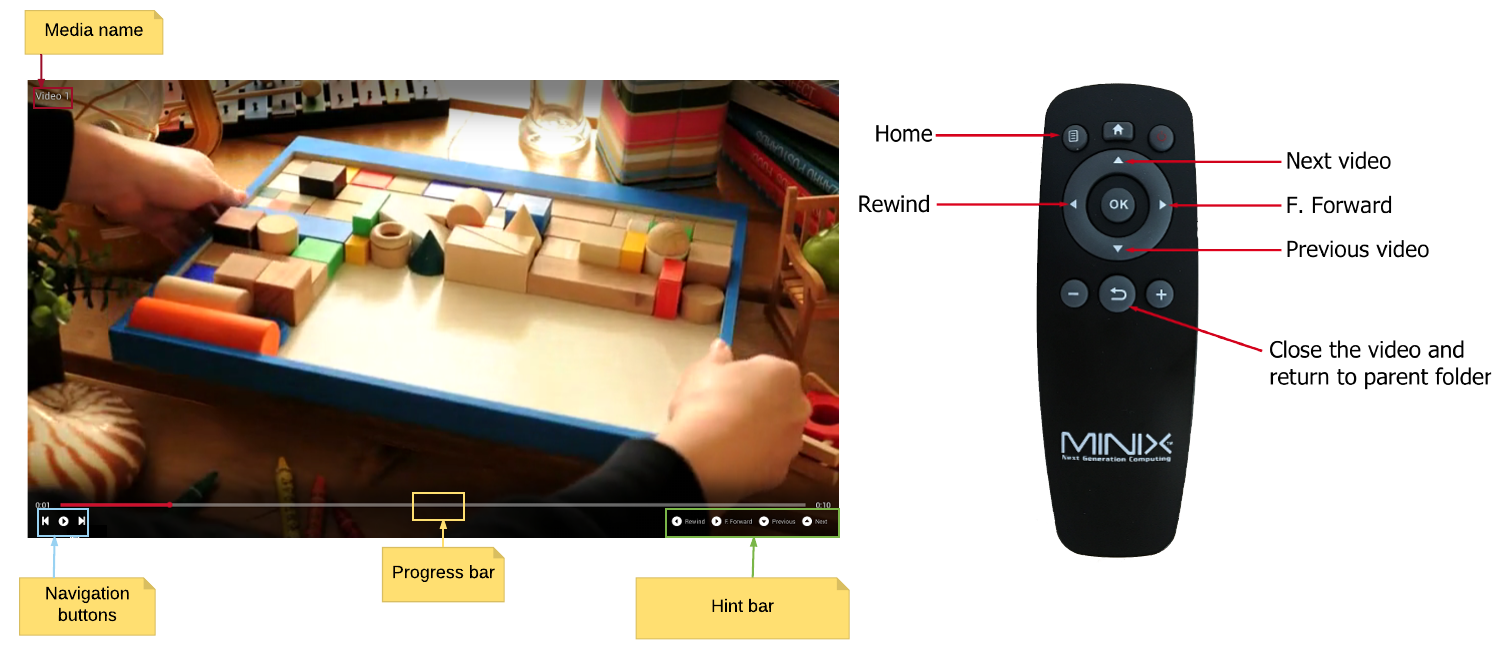
When opening a video, some of the remote control functions will be changed: the navigation buttons will become next video/previous video and rewind/fast forward.
Remote control commands:
Command | Description |
Seek forward 10 seconds | Short press “F. Forward” button |
Seek backward 10 seconds | Short press the “Rewind” button |
Seek forward 30 seconds continuously | Press and hold the “F. Forward” button |
Seek backward 30 seconds continuously | Press and hold the “Rewind” button |
Play next video | Press the “Next” button |
Play previous video | Press “Previous” button |
Pause video | Press “Ok” button |
INFO | The on-screen controls auto hides if more than 5 seconds passed without media interaction |
| The video aspect ratio and the volume are set from MVision CMS | |
| The duration set from MVision CMS is ignored; only the natural duration is used |
| RECAP | The VoD channel must have the “[VOD]” prefix |
| A VoD channel can have images, videos, TV pass through (from MVPTV), playlists or tags | |
| A tag or a playlist from a VoD channel will be interpreted as folders | |
| Both the remote control and the keyboard can be used to control the VoD application |
Step by step instructions for creating a VoD channel
In order to display VoD content, there are a few settings that must be made in MVision CMS:
Step 1. Prepare the channel that will play VoD content
1. Open MVision Admin

2. Open the Channels menu and create a new channel that has the [VOD] Prefix. It is critical for future updates that the channel has the same name as another non-vod channel. For instance, if the workgroup has a channel called Channel 01, I should create a VOD channel called [VOD] Channel 01. This will allow us to combine the channels in upcoming releases.
![Two channels with the same name, except one having the [VOD] prefix](https://lh6.googleusercontent.com/n5jT2-fRmg4aMwZQArXq4QZ9mNdA7OVztGfNwFWdadc5AQXamfnp7nwOJR6-PYxe51xhvDHcu2gpldnI4XwEa3_IMW4RLmYwYa2VBdG0wfPN_vkjn8ePmK9nrk2fp0QTXzod5TzB)
Two channels with the same name, except one having the [VOD] prefix
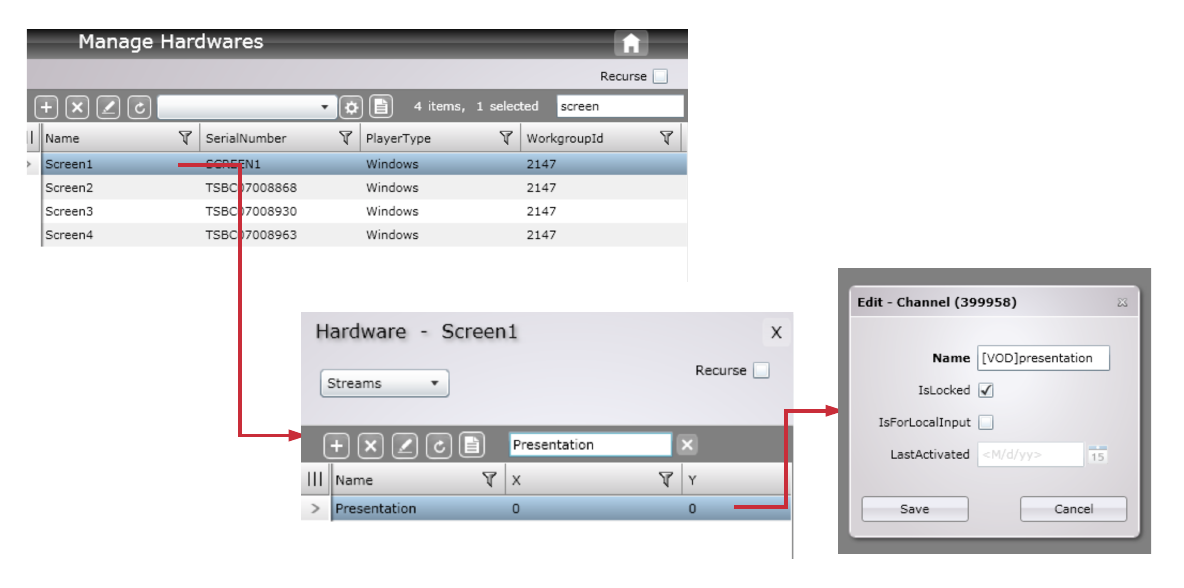
3. Open the Hardware menu and select the player where you wish to display video on demand

4. Navigate to the streams section of the selected hardware, create a new stream and assign it to the corresponding [VOD] Channel. The name, size and position of the VOD stream do not matter. VOD will always play “fullscreen”.
Note: You can also use an existing “non-vod” channel by adding the same [VOD] prefix to the stream name itself - however this is not recommended and may not be supported in future releases.
That’s it, now the player is ready to show video on demand.
RECAP | You need to have access to MVision AdminApp |
You need to create (or modify) the desired channel and add the “[VOD]” prefix to its name |